Fedora Magazine just published an excellent article on how to access CSV data using Python3 (on Fedora, but the methods work on all Python platforms). Although I do use .csv in my daily workflow, I do have many employees and partners who prefer the ease of use of sending and receiving .xlsx files. This is mainly because there’s little to no confusion on formatting of an .xlsx document (and one less step when importing in either Excel or LibreOffice).
This introductory tutorial assumes you have a working Python3.x environment set up.
Installation of modules
I use this module for handling .xlsx data: openpyxl: This module reads data from Excel 2010 formats.
Installation via pip:
python3 -m pip install openpyxl
Writing .xslx data
I do more writing .xlsx files in my field than I do reading, so I have a standard way of handling my data, and I’ll provide my makeshift ‘workhorse’ function below.
When using openpyxl you’ll have to import the module then create a Python object:
import openpyxl
workbook = openpyxl.Workbook()
Now that the object is created, there’s nothing there - not even the default Worksheet which you’ll get when you create a new file in Excel or Libre Office, so you’ll have to create that first worksheet with:
worksheet1 = workbook.active
You could be done here, but what’s the point in creating a blank sheet? Let’s put some data in, the folks who wrote the xlsxwriter module made this is pretty straightforward.
worksheet1.cell( column=1, row=1, value='This is content for A1')
accessing the cells like this works like a grid starting from the top left. This is a bit counter-intuitive for folks used to working with data, so they’ve also written in a shortcut to write via the standard spreadsheet column designation:
worksheet1['C3'] = 'This is content for C3'
This is much easier!
Before you’re done, you’ll have to close the .xlsx object so the file is written (this is all handled in memory for a faster final write-to-file)
workbook.save(filename='./my-test-file.xlsx')
Don’t forget to close the object (or don’t if you’re done with the Python script, it’ll clean up after itself)
workbook.close()
In conclusion, it’s easy to write to files, and there are a plethora of options for not only data, but also formatting. These are well-documented here at the xlsxwriter’s documentation.
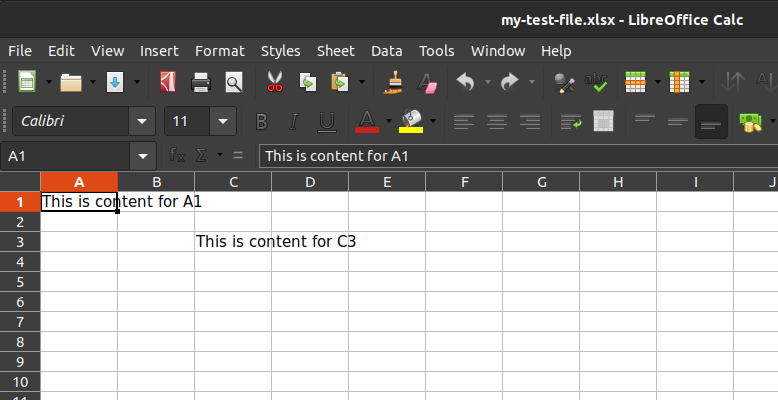
If you open the new file you should see:
For your convenience here’s all the code above in one easy-copy and paste block:
import openpyxl
workbook = openpyxl.Workbook()

# Create first worksheet
worksheet1 = workbook.active

# Write data via grid to A!
worksheet1.cell( column=1, row=1, value='This is content for A1')

# Write data to grid via spreadsheet numbers
worksheet1['C3'] = 'This is content for C3'

# Write and close the workbook
workbook.save(filename='./my-test-file.xlsx')

workbook.close()
Reading .xlsx data
The few times I’m pulling in data from an .xslx file (my job is usually collating and converting data to .csv or other formats), I use the openpyxl library module.
If you’ve copied and executed the code above, the code below will read from the created .xslx file:
Import the openpyxl library and load the created xlsx file from above…
import openpyxl
WorkbookRead = openpyxl.load_workbook(filename = 'my-test-file.xlsx')
This part is a bit tricky. What I’m doing here is making a reference to the first worksheet in the file. I’m not doing any error checking (such as a completely empty .xlsx, so you might want to check the len() of WorkbookRead.sheetnames before you do this).
worksheet1 = WorkbookRead[ WorkbookRead.sheetnames[0] ]
We can now access the worksheet values.
print('A1', worksheet1['A1'].value)
will print out a string: A1 This is content for A1
print('C3', worksheet1['C3'].value)
will print out a string: C3 This is content for C3
print('D1', worksheet1['D1'].value)
will print out a None python object: D1 None
If you’re wanting to grab cell data in a loop, you can also grab reference to the cell object via worksheet1.cell( X, Y ) starting from 1 as above.
print("cell 1,1", worksheet1.cell(1,1).value )
Don’t forget to close the object (or don’t if you’re done with the Python script, it’ll clean up after itself)
WorkbookRead.close()
When you run this script you should see: 
Here’s all the lines together for as above:
import openpyxl
WorkbookRead = openpyxl.load_workbook(filename = 'my-test-file.xlsx')

# Grab the first worksheet, you could also call it by name if you know the name such as worksheet1['Employee Statuses']
# If you don't know the list of names, you can easily cycle through the xlsb.sheetnames list and get a list of each
worksheet1 = WorkbookRead[ WorkbookRead.sheetnames[0] ]

# Get and print the value of A1
print('A1', worksheet1['A1'].value)

# Get and print the value of C3
print('C3', worksheet1['C3'].value)

# Get and print the value of D1
print('D1', worksheet1['D1'].value)

# You can also grab the cell numerically
print("cell 1,1", worksheet1.cell(1,1).value )

WorkbookRead.close()
More examples can be found here at the module’s document page: openpyxl’s documentation.